
Browse online or in-store
and proceed to checkout
You have no recently viewed items.


Stamp. Style. Slay.
Unleash your inner nail artist with the Maskscara Nail Art Stamping Plate Collection. Expertly designed and manufactured to meet the highest standards for nail art applications.
These plates feature crisp, detailed engravings that deliver flawless transfers every time.
From R33.33 p/m, interest & fee free. ?
PayJustNow allows you to pay for your purchase over 3 payments with 0% interest and no fees. Pay a third at checkout and you get your goods as if you have paid in full. The remaining two instalments are debited on your specified instalment date.
Browse online or in-store
and proceed to checkout

Choose PayJustNow as
your payment method
Create your account and get
an instant approval decision

Complete your
transaction
Be over 18
years old
Be a SA
resident
Have a debit or
credit card
Have an email
address
0% INTEREST. 3 PAYMENTS. NO STRESS.
WHY PAY ANY OTHER WAY?Absolutely love this pink. Has a tiny bit of glitter to it - I love it!
Lamp cures perfectly each time. Will highly recommend it to anyone!
I have been struggling with the condition of my nails very soft and broke easily. My nails have now started improving since I started using nail Armour. I'm very happy.
Nice grey shade the best quality
Perfect soft yellow shade would recommend
The best its a stunning shade
The product is great, I was thinking it would be more of a deep red but it’s more a deep plum which my client still loves. So I’m saving for my next order to get the Vampire gel, hopefully that is more deep red or maroon.
Stunning shade of Red. Definitely pops and needs no intro. Very striking.

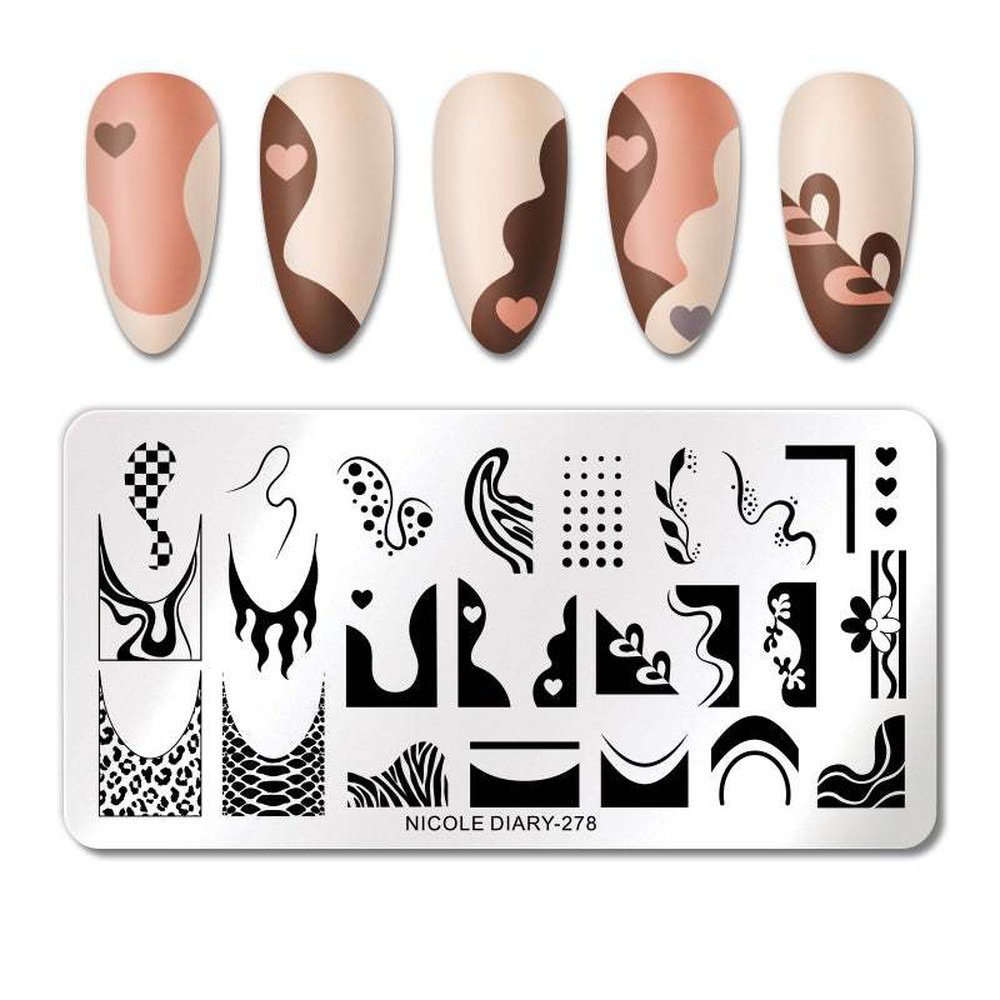
Introducing our collection of nail art stamping plates. Designed and manufactured to meet strict requirements for use with nail art applications, our plates work perfectly in a variety of applications. They can be used with Maskscara Gel-it polishes for a fun nail art twist. The possibilities are endless so get creative with Maskscara !
PRODUCT DESCRIPTION:
Design: Nicole Diary
Type: Nail Art Stamping Plate
Quantity: 1 Pc
Size: 12cm * 6cm
Material: Stainless Steel
PACKAGE CONTENTS:
1 Pc Designer Nail Stamping Plate
HOW DO I USE IT?
Apply base coat or regular polish on the nail.
Apply the stamping polish to desired image within a stamping plate.
Use your scraping tool at a 45 degree angle to scrape excessive polish from the plate.
Apply the stamper to the plate with a gentle rolling motion to pick up the design.
The image will be transferred to the stamping tool.
Using a rolling motion, stamp the image on your nail.
The image will be transferred to your nail.
Repeat the same steps for all of your nails you wish to stamp.
Once all designs have been stamped, apply a long-lasting gel top coat and cure.
How to Use Your Nail Art Stamping Plates
💡 Pro Tip: Clean your stamping plate and stamper between uses with a lint roller or non-acetone remover to keep designs crisp.
Sign up for our newsletter and be the first to know about coupons and special promotions.
© 2025, Maskscara Powered by Shopify
PAYMENTS ARE INTEREST-FREE WITH NO DEPOSIT REQUIRED. #CHOOSEHAPPY
Add items to your cart.
Choose ![]() at checkout.
at checkout.
Enter your payment details & payday.
Your first payment (50%) is made on your first payday post-purchase and the second payment (50%) is made on your next payday thereafter.